Road bike tires come in three main types: clincher, tubeless, and tubular. Clinchers are the most common with inner tubes, tubeless tires provide puncture protection, and tubular tires are glued to the rim, typically used for racing.
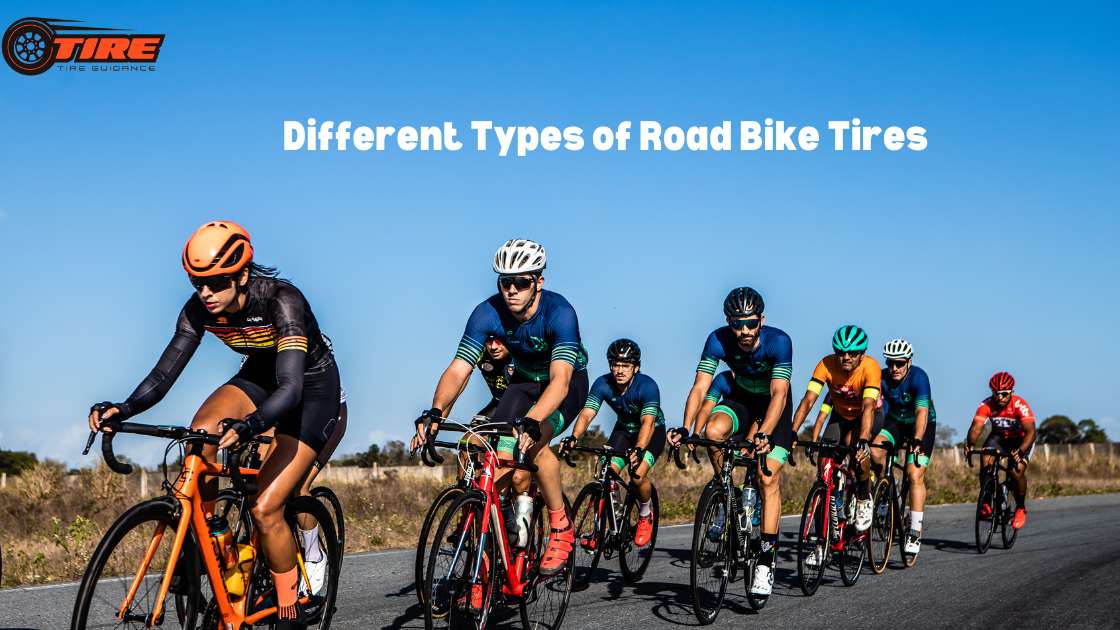
Now Let’s explain “Different Types of Road Bike Tires”
Table Of Contents
Introduction to Road Bike Tires
When it comes to road biking, the difference between a smooth ride and a bumpy one often comes down to the tires. Selecting the right tires is crucial for both performance and safety. This decision can influence everything from speed to handling, and failure to choose wisely may lead to frequent flats or unpredictable traction.
Importance of Choosing the Right Tires
Choosing the right road bike tires can significantly enhance your cycling experience. Imagine embarking on a long ride only to find that your tires are not compatible with the terrain or conditions. This can not only hinder your performance but may also put you at risk of accidents. For instance, a cyclist named Mike learned this the hard way.
Eager to tackle a sudden ascent during a group ride, he found his tires lacking grip due to their slick design, leading him to slip and barely maintain his balance. On the other hand, those with the right tires sailed smoothly up the hill, effortlessly maintaining traction.
Key Benefits of Selecting the Right Tires:
- Enhanced Performance: Properly chosen tires improve rolling resistance and speed, making climbs and descents easier.
- Better Traction: Tires that suit the climate and terrain lead to better grip and handling, giving cyclists confidence on various surfaces.
- Reduced Risk of Flats: High-quality tires are designed to withstand punctures, helping prevent flat tires when you least expect them.
- Increased Comfort: The correct tire size and type can absorb road vibrations, resulting in a more comfortable ride over long distances.
Factors to Consider when Selecting Tires
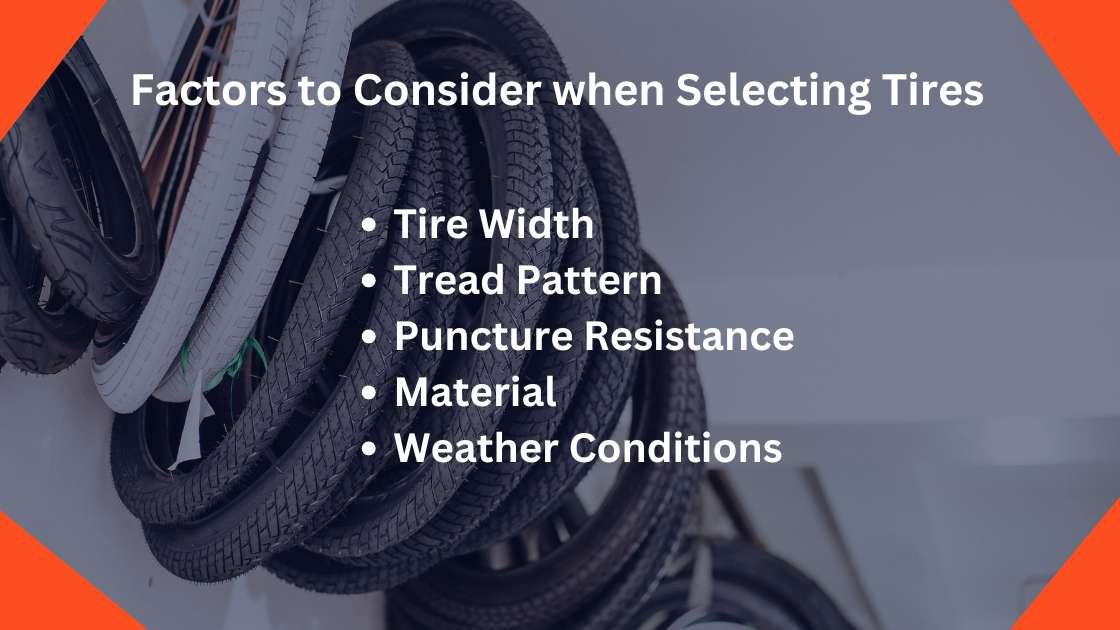
Selecting the best road bike tires isn’t just about grabbing the newest model on the market. Several important factors need careful consideration:
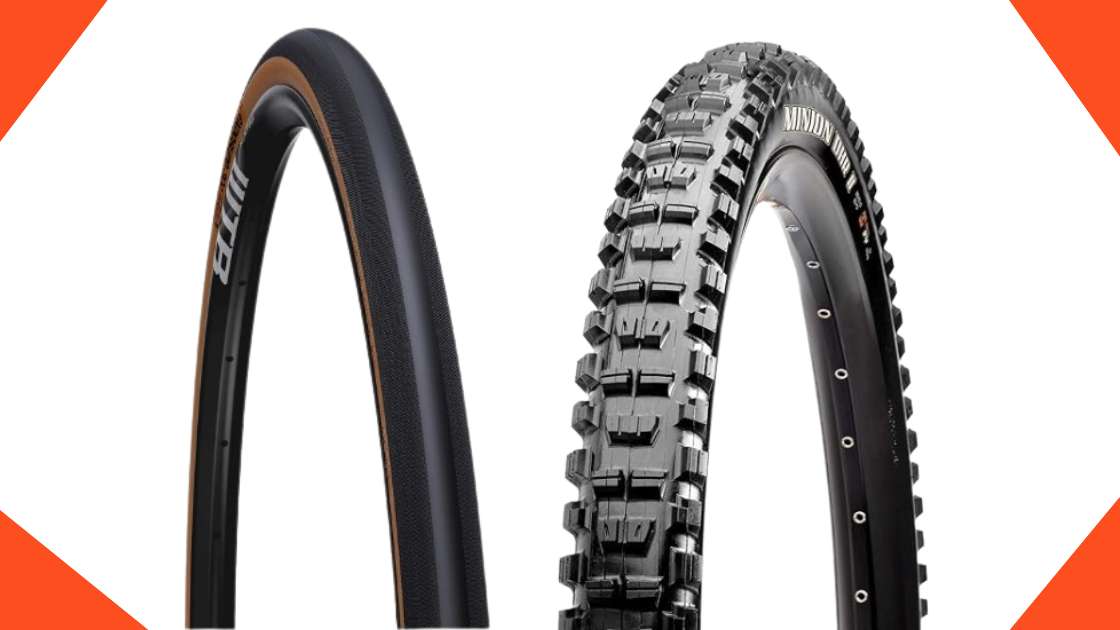
- Tire Width: Wider tires can offer better comfort and grip, while narrower tires are generally faster and lighter. Determine which width suits your riding style.
- Tread Pattern: The tread affects traction. Smooth tires are ideal for wet conditions, whereas those with more tread are better for mixed terrain.
- Puncture Resistance: Look for tires that offer excellent puncture resistance, especially if you plan to ride in urban areas or off roads.
- Material: Tire composition can dictate the ride quality. Rubber compounds can differ in durability and grip.
- Weather Conditions: Consider your local climate. Different tires perform optimally in wet or dry conditions.
In summary, when it comes to road bike tires, knowledge is power. Understanding the importance of tire selection and being aware of key factors can lead to a more enjoyable and safer cycling experience. There’s a world of difference when you roll out with the right set of tires—make your choice count!
Clincher Tires
Having introduced the significance of selecting the right tires, let’s delve into one of the most popular options available for road cyclists: clincher tires. These tires have become a favorite for many cyclists, thanks to their user-friendly design and robust performance.
Construction and Design
Clincher tires are characterized by their dual-layer design, consisting of a tire casing and a separate inner tube. The inner tube is inflated separately, and it gets secured against the rim when the tire is mounted. Here’s a deeper look at their construction:
- Tire Casing: Made from materials like nylon or polyester, the tire casing provides flexibility and strength. This is crucial for both shock absorption and durability.
- Inner Tube: The inner tube is the inflatable section that holds air pressure inside the tire. As it inflates, it pushes the tire against the rim — a process that creates a firm seal.
- Rim: Clincher rims must have hooks to grasp the tire bead securely. Proper rim compatibility is essential for safe and effective tire installation.
Clincher tires are favored for their versatility, as they can accommodate a range of inflation levels, providing cyclists with options to fine-tune their ride’s feel based on conditions.
Pros and Cons of Clincher Tires
Despite the popularity of clincher tires, understanding the pros and cons can help cyclists make informed choices based on their specific needs.
Pros:
- Ease of Installation: Clinchers are straightforward to install or change. Even novice cyclists can handle tire changes without professional help, making them convenient for on-the-go repairs.
- Widespread Availability: Clincher tires are available in a vast array of sizes and tread patterns. This accessibility makes it easy to find the right fit for every bike and cycling style.
- Customize Pressure: Riders can easily adjust the air pressure in their inner tubes to suit various terrains or personal preferences, enhancing the riding experience.
- Cost-Effective: Clincher tires are generally less expensive compared to other tire types, which appeals to many cyclists budget-wise.
Cons:
- Puncture Risk: While clinchers have some puncture resistance, they are still susceptible to flats. The presence of an inner tube increases the chances of getting a flat in case of sharp objects on the road.
- Weight: Clincher setups can be heavier than some alternatives, like tubular tires, which may be a concern for competitive cyclists striving for the lightest gear.
As you embark on your cycling journey or seek to upgrade your equipment, exploring clincher tires is a step forward. While they offer a range of advantages, being aware of their limitations will help you make conscientious choices for your road biking adventures.
With the right clincher tires, you can enjoy a smooth and thrilling ride, whether you’re commuting, racing, or out for leisure.
Tubular Tires
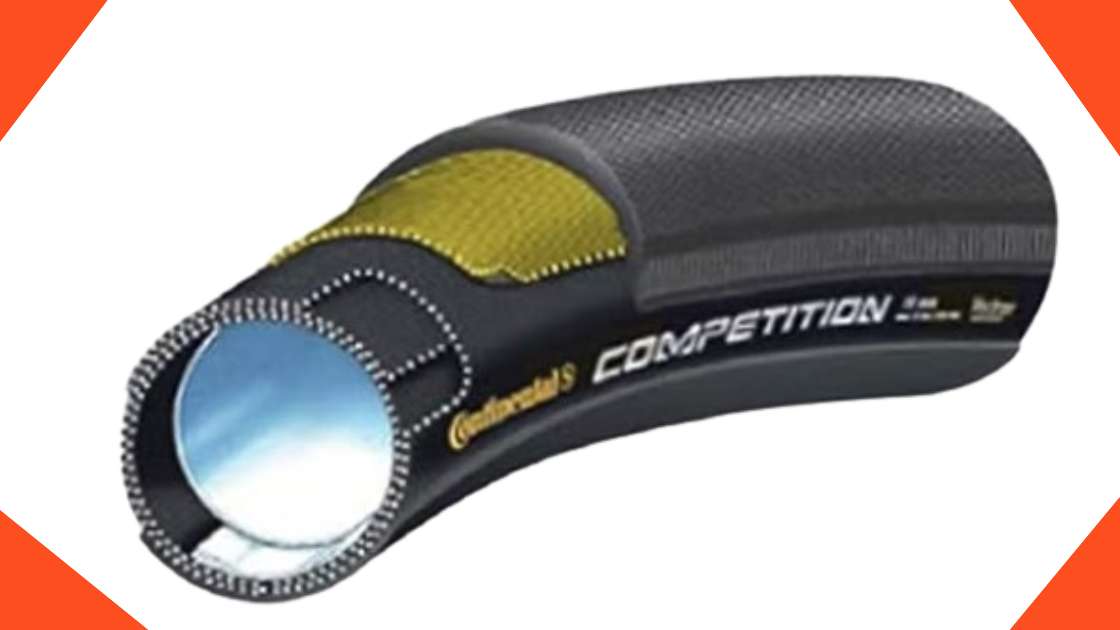
Continuing the exploration of road bike tires, let’s turn our attention to another compelling option tubular tires. While not as common as clinchers, they hold a special place in the hearts of many competitive cyclists due to their unique features and benefits.
Features and Benefits
Tubular tires, also known as sew-ups, are distinct in their construction – the tire and the inner tube are sewn together. This creates a single, unified structure that is glued to the rim rather than mounted like a clincher.
This setup comes with several notable benefits:
- Lightweight Performance: Tubular tires tend to be lighter than their clincher counterparts. Many racing cyclists appreciate this weight reduction, as it can enhance their speed and agility on the road.
- Superior Ride Quality: The design of tubular tires allows for lower air pressure, resulting in better shock absorption. Cyclists often report a smoother ride, especially on rough terrain.
- Puncture Resistance: While all tires are subject to punctures, tubulars often fare better due to their airtight nature. Many manufacturers use tougher materials, which can reduce the likelihood of flats.
- Aerodynamic Benefits: The round shape of tubular tires helps minimize rolling resistance. This streamlined design can provide performance advantages during races or long-distance rides.
One cyclist, Sarah, opted for tubular tires for her first triathlon. She found that not only did they improve her speed, but they also provided a level of comfort that helped her maintain endurance throughout the race.
Installation and Maintenance Tips
While tubular tires offer numerous advantages, they do require specific knowledge regarding installation and maintenance. Here are some practical tips to help ensure that you get the most out of your tires:
- Installation:
- Ensure the rim is compatible with tubular tires. Tubular rims typically have a smoother surface and are slightly different in shape.
- Apply a layer of tubular glue to both the rim and the tire. Allow the glue to become tacky before pressing the tire onto the rim.
- It’s wise to let the glue cure for at least 24 hours before riding to ensure a secure bond.
- Maintenance:
- Check tire pressure regularly. Tubulars can lose air slowly, so maintaining the proper inflation is key for optimal performance.
- Inspect for damage often. Look for any signs of wear, such as cuts or tears on the tire sidewalls.
- When punctures occur, repairs can be challenging. Many cyclists opt to bring spare tubulars to races and apply a new tire rather than patching on the go. However, a butter knife can help push a patch securely against the inner tube if needed—a handy trick learned by experience!
In conclusion, tubular tires represent a tried and tested option for cyclists who prioritize performance and ride quality. Though they require a bit more care compared to clincher tires, the rewards of improved speed and ride comfort often justify the extra effort.
Whether you’re racing or simply seeking a more enjoyable ride, considering tubular tires might just be the way to elevate your cycling experience.
Tubeless Tires
Shifting gears from tubular tires, let’s explore a fantastic option that has gained traction in the cycling community: tubeless tires. These innovative tires eliminate the need for inner tubes, leading to an entirely different set of benefits and considerations.
Advantages of Tubeless Technology
Tubeless tires have revolutionized cycling with their design and functionality. Here are some key advantages that make them appealing to both casual riders and serious enthusiasts:
- Reduced Risk of Flats: Since tubeless tires don’t have an inner tube, they minimize the risk of pinch flats, which often occur in traditional tires. Even if punctured, many tubeless tires can self-seal due to the sealant inside, allowing you to keep riding without interruption.
- Lower Tire Pressure Options: Tubeless tires allow riders to run lower air pressures without the worry of pinch flats. This provides better traction on rough terrain and improved comfort by absorbing road bumps, which cyclists like Andrew have found invaluable during long rides on uneven surfaces.
- Enhanced Performance: The absence of an inner tube leads to reduced rolling resistance, helping you achieve higher speeds. Many cyclist enthusiasts argue that the difference in performance is immediately noticeable, especially during long-distance rides or races.
- Versatility: Tubeless tires are available in various sizes and tread patterns, making them suitable for different types of biking, whether on pavement or off-road.
- Weight Savings: Without the extra weight of an inner tube, tubeless setups can be lighter than traditional tires, contributing to quicker acceleration and better handling.
How to Set Up Tubeless Tires
Setting up tubeless tires may seem daunting at first, but with the right steps, it can be a straightforward process.
Here’s a guide to help you get started:
- Gather Your Tools and Materials:
- Tubeless-ready tires and rims
- Tubeless valve stems
- Sealant (like Stan’s NoTubes or similar products)
- A floor pump or compressor
- A rim tape (if not already installed on the rim)
- A tire lever (optional)
- Prepare the Rim:
- Make sure your rim is clean and free of debris.
- If your rim isn’t tubeless-ready, apply a proper tubeless rim tape to seal the rim’s center channel. Ensure no overlaps exist, as air can escape through any gaps.
- Install the Valve Stem:
- Insert a tubeless valve stem into the valve hole of the rim. Tighten it securely, ensuring a good seal.
- Add the Sealant:
- Before mounting the tire, pour the recommended amount of sealant (usually around 2-4 ounces) into the tire through the valve stem. Alternatively, you can add it directly to the tire before mounting.
- Mount the Tire:
- Fit one side of the tire onto the rim, then add a bit of air to get it seated. Tire levers can be handy if the tire is particularly tight.
- Once the first bead is on, work the second bead onto the rim, making sure to keep the sealant from spilling out.
- Inflate and Seal:
- Inflate the tire quickly using a floor pump or compressor until you hear a distinct ‘pop’ sound that signifies the tire bead has been seated properly.
- Shake and roll the tire to distribute the sealant inside evenly.
- Final Check:
- Double-check for leaks or any air escaping through the valve or bead area. If everything looks good, repeat the same process for the second tire!
By following these steps, cyclists can enjoy the many perks that tubeless tires offer. They may require a bit more setup than traditional tire options, but once installed, the performance gains and reduced flat risk are undeniable.
So, if you decide to make the switch, you’re sure to enjoy a ride that’s not only smoother but also worry-free!
Sew-Up (Tubular) Tires
As we transition from tubeless tires, let’s explore the classic sew-up (or tubular) tires that have been a staple in the cycling world for many years. While newer technologies have emerged, sew-up tires still maintain a loyal following, especially among competitive cyclists.
Understanding Sew-Up Tire Construction
Sew-up tires are distinctive due to their unique construction. Unlike clincher tires, where the tire and inner tube are separate entities, a sew-up tire is a single unit—a tire and inner tube that are stitched together.
- Casing Material: The outer layer is usually made from durable materials like cotton or synthetic fibers, which provide flexibility and strength. This construction helps the tire to maintain its shape and improve ride quality.
- Inner Tube: The inner tube is already sewn into the tire casing. This means that when you inflate it, the entire tire expands uniformly. This design contributes to a softer ride and minimizes rolling resistance, factors that performance-oriented cyclists value.
- Glued to the Rim: Unlike clinchers, sew-up tires need to be glued onto a specific rim designed for this purpose. The glue creates a strong bond that keeps the tire secure during rides, but it also requires a higher level of care and maintenance.
Sew-up tires, while perhaps less popular in casual cycling circles, are often the choice of racers and competitive cyclists who appreciate their performance benefits.
Sarah, a seasoned racer, shared her experience of switching to sew-up tires, claiming her ride felt “lighter and faster,” especially on race day.
Recommended Use and Care for Sew-Up Tires
Using sew-up tires comes with its own set of advantages and responsibilities. Here’s a quick guide on when to use them and how to care for them:
Recommended Use:
- Competitive Racing: Sew-up tires excel in settings where performance is key. Many competitive cyclists prefer them for road racing due to their reduced weight and improved ride feel.
- Events and Long Rides: For cyclists preparing for events like century rides or triathlons, sew-up tires can provide the performance boost needed for achieving personal bests.
- Courses with Fewer Potholes: While they perform admirably, sew-up tires are better suited for smooth, well-paved surfaces. Riding on rough roads may lead to damage due to their less forgiving nature.
Care Tips:
- Regular Checks: Inspect the tire regularly for any damage, such as cuts or punctures. The earlier you catch a problem, the easier it is to fix or replace it.
- Proper Inflation: Keep an eye on tire pressure. Sew-up tires can lose air over time, so ensure they are inflated to the recommended PSI for optimal performance.
- Gluing Techniques: When replacing a tire, make sure to use appropriate tubeless tire glue. Apply several layers for the best bond, and ensure adequate drying time.
- Spare Tires: Given the nature of sew-up tires and the potential for damage during rides, it’s wise to carry a spare. Thin cuts can be repaired on the go, but having an emergency tire can save you from a long walk home.
In summary, while sew-up (tubular) tires may require a bit more effort in installation and care, they deliver excellent performance benefits that many cyclists cherish. With the right maintenance and a bit of practice in gluing and installing, you’ll be well on your way to enjoying the many advantages these classic tires have to offer. If you’re looking for speed and efficiency in your cycling experience, consider giving sew-up tires a spin!
FAQ for Different Types of Road Bike Tires
What is the difference between clincher and tubeless road bike tires?
Clincher tires use an inner tube to hold air, while tubeless tires do not require an inner tube and instead create an airtight seal between the tire and the rim. Tubeless tires are less prone to punctures and offer better traction, but clincher tires are easier to install and repair.
Are wider road bike tires better for all types of riding?
Wider tires provide better comfort, stability, and traction, especially on rough terrain or long rides. However, narrower tires are typically preferred for racing and smooth road conditions due to their lower rolling resistance and enhanced speed.
How often should I replace my road bike tires?
The lifespan of road bike tires varies depending on usage, road conditions, and maintenance. On average, road bike tires should be replaced every 2,000 to 4,000 miles, or when you notice significant wear on the tread or frequent punctures.
Can I switch from clincher tires to tubeless tires on my road bike?
Yes, but you’ll need tubeless-compatible rims and tires. Additionally, you’ll need sealant to help create an airtight seal. Some road bikes may require new rims to accommodate tubeless tires, so check compatibility before switching.
What tire pressure should I use for road bike tires?
Tire pressure depends on your tire width, rider weight, and road conditions. Typically, narrower tires (23-25mm) require higher pressure (90-120 psi), while wider tires (28mm and above) work well with lower pressure (70-90 psi). Lower pressure can enhance comfort and traction, especially on rough roads.
What’s the best type of road bike tire for wet weather?
For wet conditions, tires with a slight tread pattern offer better grip compared to slick tires. Tubeless tires can also provide enhanced traction and lower the risk of punctures in wet conditions. Look for tires with good water-shedding properties to ensure safety in the rain.


